Most elementary classrooms use low tech assistive technology
without even knowing it. This blog will highlight some simple AT things that
are commonly found in the classroom. Most of these items can benefit all
students, not just students with disabilities!
(Reminder:
Low tech assistive technology is not complex, does not require extensive
training, is not battery or electrically operated, and is typically low cost.)
v
Holding a pencil can be a challenge to students
who are just learning to write. Grasp progresses as we develop from a
scribbling 3 year old to a writing kindergartner. Around age 5-6 a student
should be using a mature tripod pencil grasp (see image below). However, the tripod
grasp does not always develop on its own – see below for some AT tricks to
facilitate development. (Also visit this cool resource for more info
on the progression of grasp patterns:
http://www.ot-mom-learning-activities.com/support-files/pencil-grasp-development-2013.pdf)
 |
| Mature tripod pencil grasp for kindergarten age students |
 |
Pencil grips can be used to facilitate appropriate finger placement
|
 |
| Clipping a clothes pin to a pencil is a great low cost way to facilitate tripod grasp! It also forces student's to tuck the remaining fingers to their palm. |
 |
Holding a small ball while writing is also a great tactile reminder for students to tuck their fingers to their palm.
|
 |
| Using a short pencil is a great way to facilitate the use of a tripod grasp because there is less room on the pencil for the other pesky fingers. You can buy shortened pencils or you can break them to be any length you want! (this technique also works great for crayons!) |
Why does it matter? The tripod grasp is the most efficient
way to grasp a pencil while maintaining joint integrity, preventing hand
fatigue, and maintaining writing energy for long periods of time.
v Adapted paper can help students learn proper
letter formation. For example letter “b” has a big line down that starts in the sky and ends on the ground. Letter “g” starts at the dotted line and
ends in the basement (yes we have our own language J). Letter formation concepts
can be very hard to learn in a limited amount of time, especially considering
capital and lowercase letters can look drastically different. Adapted paper can
provide explicit visual cues to assist with the learning curve. Adapted paper
also comes in various sizes of triple-lined paper to progress handwriting from
large to small in size.
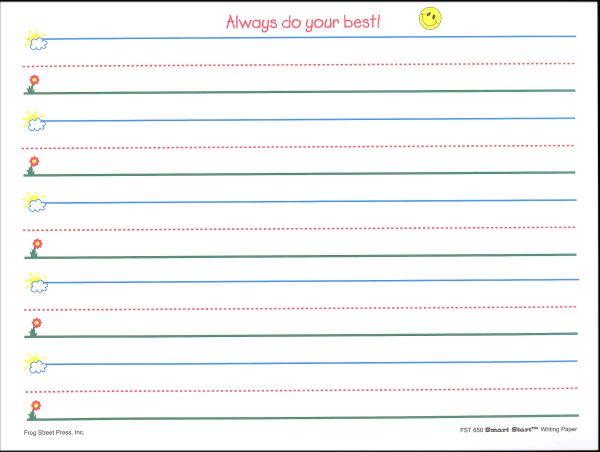 |
| Symbol paper provides great cues for letters that start in the sky and end on the ground. |
 |
| Highlighted paper is a great constant visual cue to break up the triple lined paper. This makes it east to see where all letters should begin and end. |
v
A lack of coordination can be seen when students
are learning to write. In this case, letter formation looks choppy, lines look
squiggly, and writing can be very faint. If motor coordination is the problem, a
pencil weight or rubber band can be used to bring more awareness to the student’s hand. There
is not a lot of research in this area but one article says 68% of occupational therapists
are using weighted pencils in practice. This is definitely an area for more
research!
o
Feder,
K., Majnemer, A., & Synnes, A. (2000). Handwriting: Current trends in
occupational therapy practice. The Canadian Journal of Occupational Therapy, 67, 197-204
 |
| Rubber-band being used to increase awareness and stabilization of pencil. |
 |
| Weighted pencil |
v
Class clown or sensory seeker? To work at our
fullest potential we need to be in a comfortable sensory environment. Some kids
have a really high tolerance to stimuli, they need more input to be comfortable…so
they seek input in the wrong places. This can present anywhere from talking to friends,
to squirming in their seats, to touching stuff on the desk, to getting out of
their seat, chewing on pencils, and acting out in class. See the images below
for some discrete things that can make a world of difference to the sensory
seeking student. (Disclaimer: not all students who seek sensation or avoid
sensation have sensory processing issues)
 |
Quiet fidget's can be used discretely under a desk. ALWAYS have rules and make sure the classroom teacher is on-board with the use of fidgets.
|
 |
| Placing different textures (Velcro) under a students desk can give them a non-movable source of sensory input. They can feel it whenever they want to create their "just right" sensory environment. |
 |
| Wiggle disc's can be placed in a students chair to give them a dynamic seating system. |
 |
| Thera-band can be tied around the legs of a chair for kids to bounce their feet on. Hopefully, this decreases the out of chair incidences and increases attention. |
v
Schedules with pictures placed on the board can
be a great resource for students. On top of everything students learn in school
they also have to time manage. A schedule is a great way to teach time
management. This also makes students accountable and prepared for each step of
the day.
 |
| Example schedule, add time frames to this and make is visible to all students |
****Note: There are MANY more examples of assistive technology, the ones mentioned in this blog are devices that I am becoming familiar with through my rotation.
All images in this blog were collected from Google images.


No comments:
Post a Comment